OpenAI Assistant: 3 easy steps to create
OpenAI launched "Assistants" yesterday that enable custom GPTs in a few minutes. Have you tried this?

Day by day, the usage of AI is increasing, and it is inevitable to avoid the AI tide. It is one of the times of evolution that changes the present and the future. It is here now.
What is an Assistant?
So far, the chatGPT is available for public usage. Anyone in the world can access it. The context is the same for anyone who accesses the chatGPT. Moreover, whatever information is fed via chat will be available for public consumption. It leads to privacy concerns. OpenAI launched “Assitant” which enables adding custom context specific to the purpose the GPT can be used. This brings a lot of value to the table as enterprises can create Assistants that answer queries in alignment with the business context.
This feature is available for GPT plus users or paid users.
How do I create an Assistant?
It is as same as creating a task on a Trello board. Here are the steps:
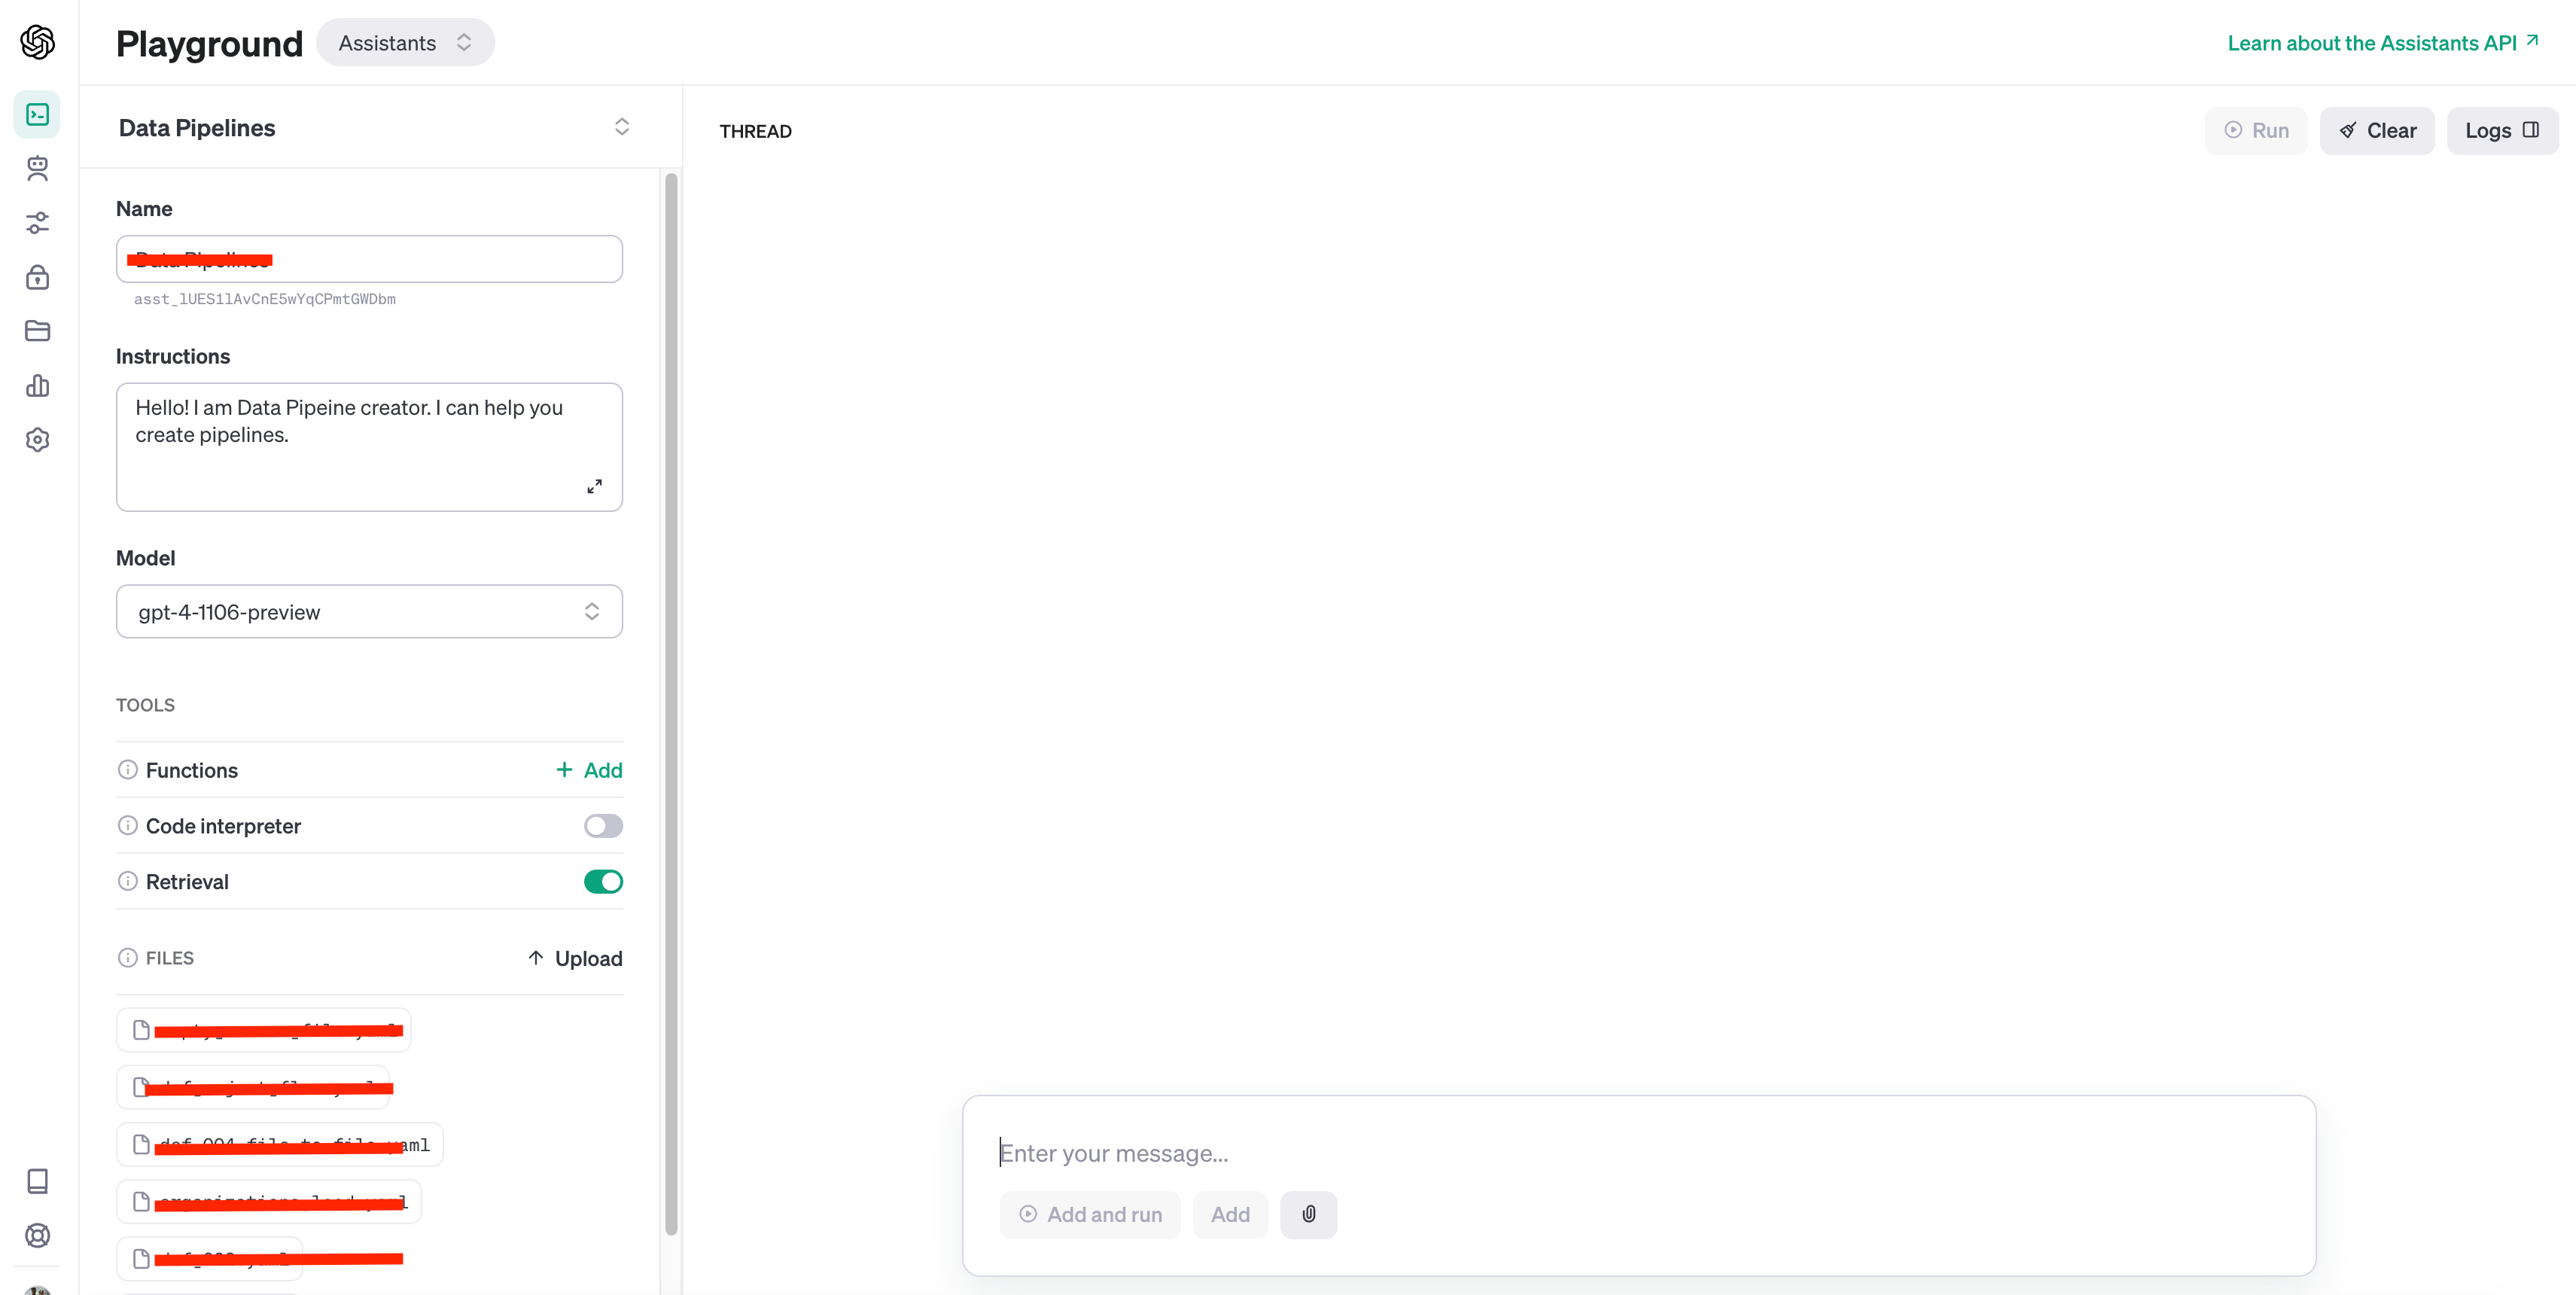
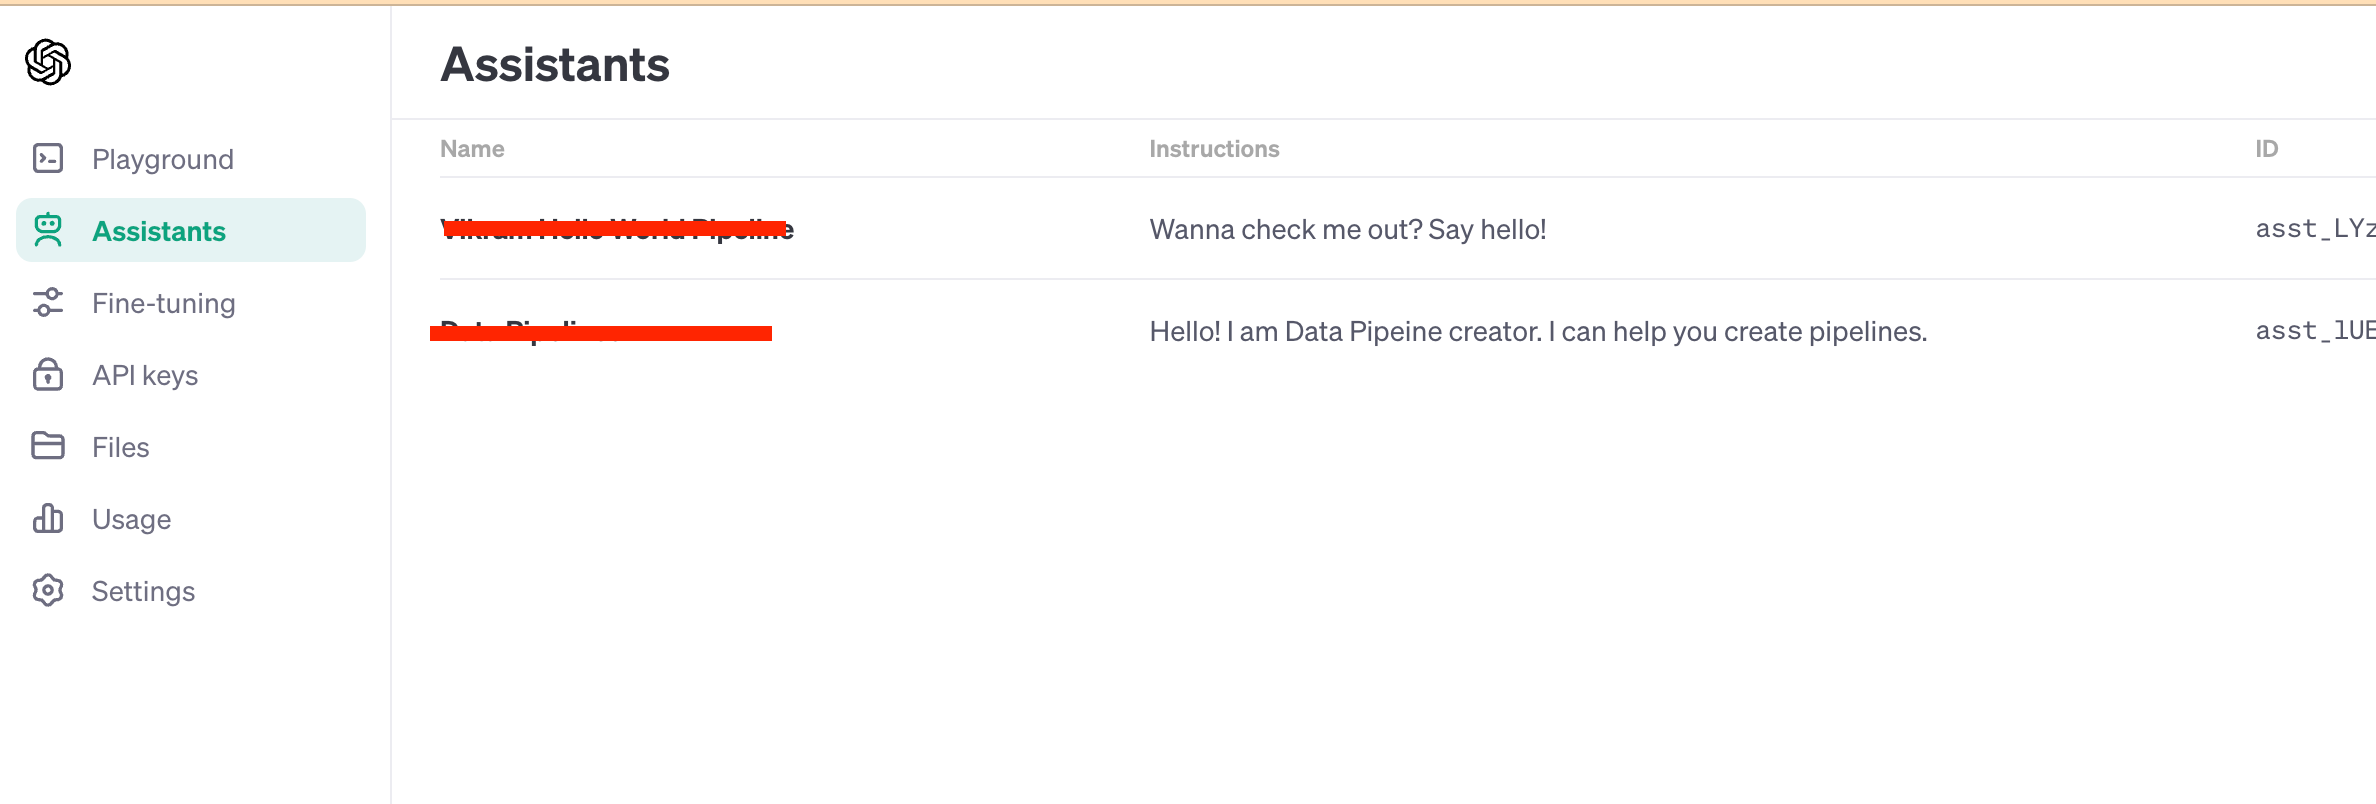
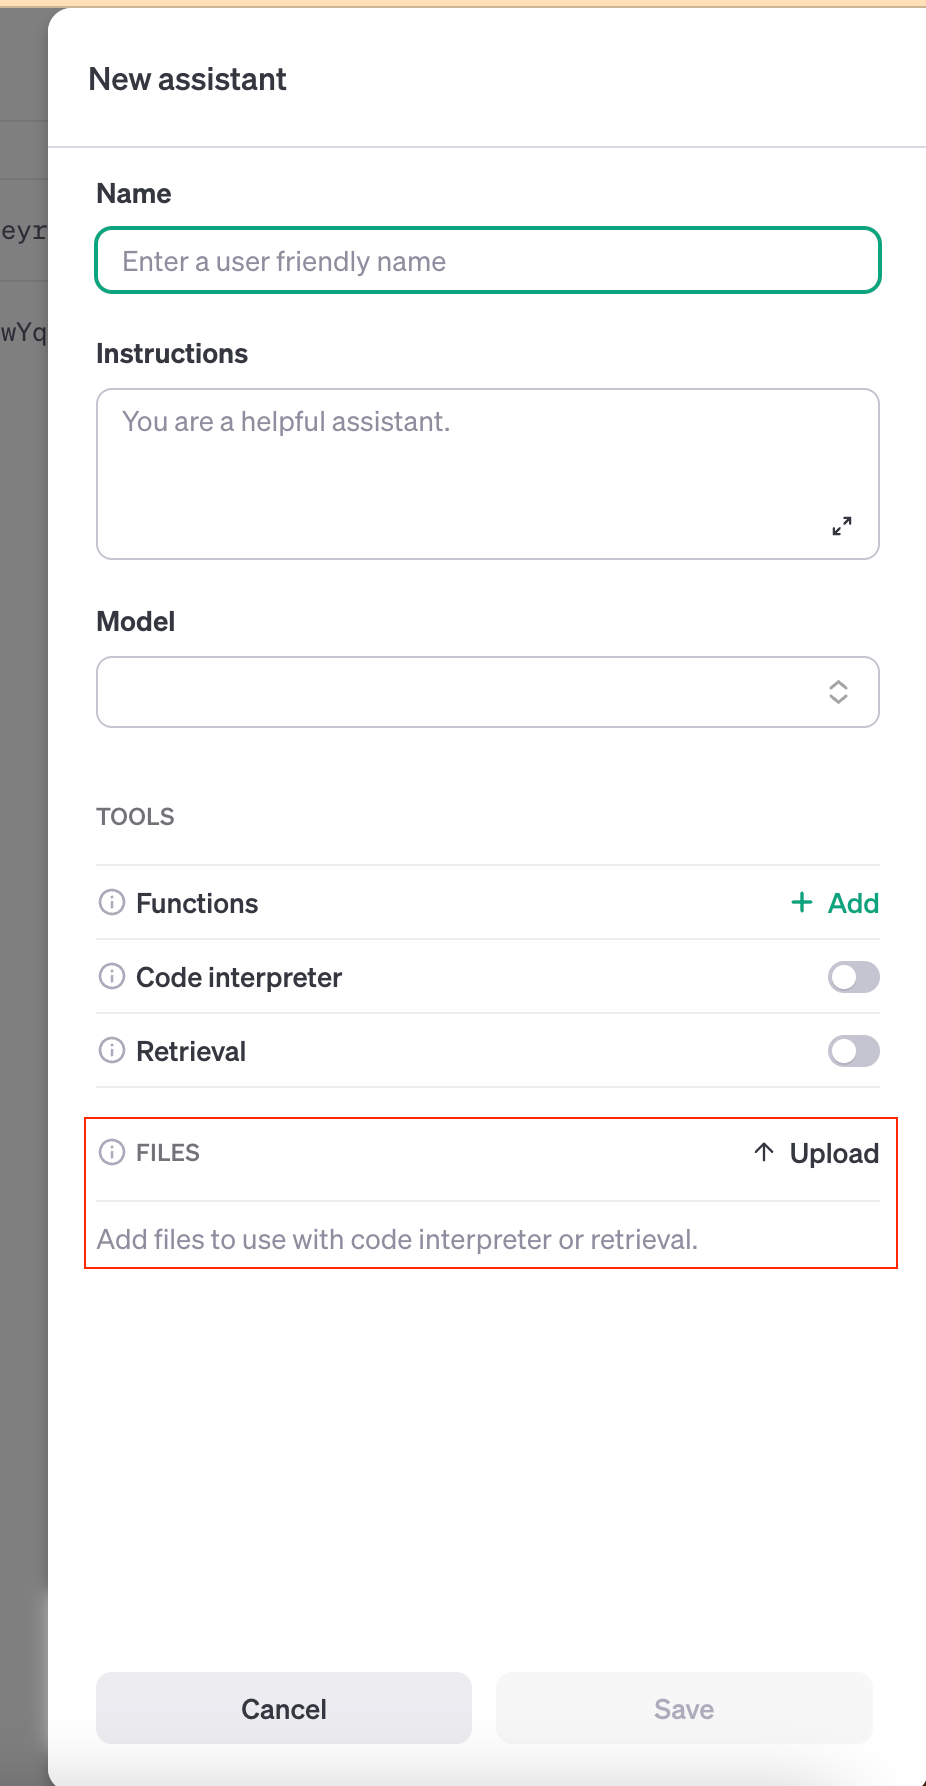
Give a name to the Assistant.
Add brief details on the purpose of the Assistant
Choose a model such as GPT4
If you are building the Assistant to help in writing code snippets, enable the code interpreter.
Retrieval is the key configuration while creating the Assistant. Enable this to consider custom context.
Files is the section where you can upload files that act as context for the Assistant. The files will be used as context only when “Retrieval” is enabled.
Test your Assistant:
After saving the Assistant, it is available for testing. You can start posting messages in the thread to get answers relevant to the context. Yahoo! Its that simple to create a Assistant.